
Complete Your Dubai Visa Application Online Step by Step
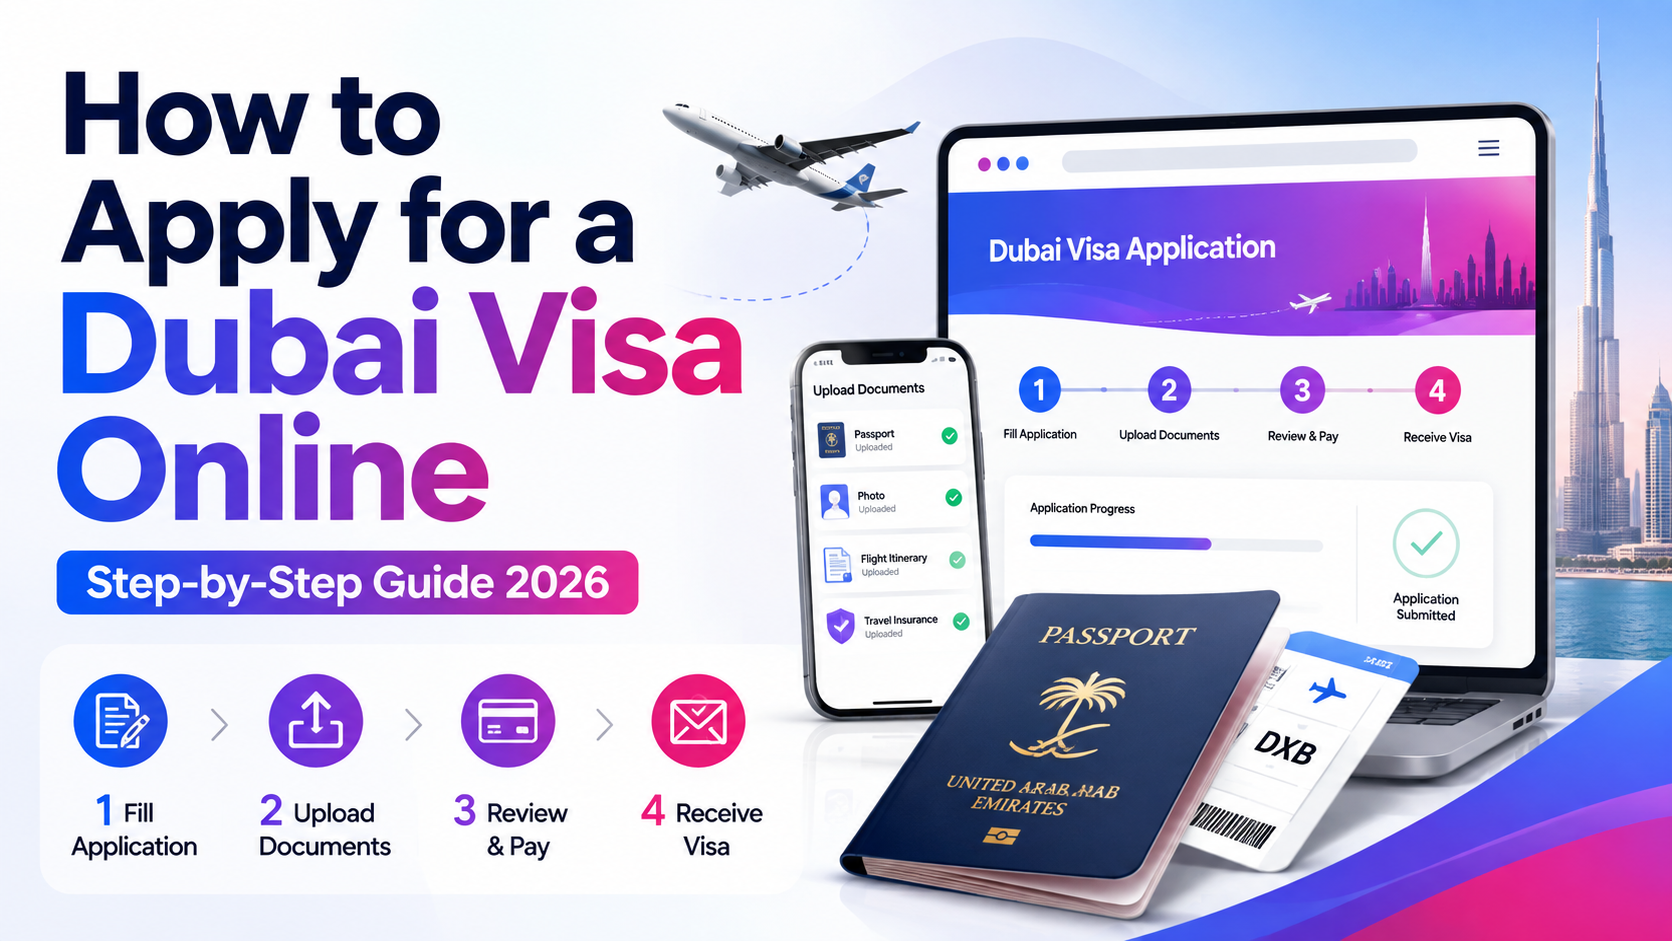
Want to apply for a Dubai visa online but are not sure where to start? This visual guide walks you through the DubaiVisa.com application, from passport nationality and travel dates to visa selection, contact details, documents and payment.
How to Apply for a Dubai Visa Online
To apply for a Dubai visa online, start the DubaiVisa.com application and select the nationality shown on your passport. Next, choose your planned stay duration and UAE travel date.
The application then shows a suitable available visa option based on the travel information entered. Review the visa, choose the available processing option, enter your contact details and complete your passport information.
Finally, upload the documents requested in your application, review all details and continue to payment.
- Start the application
- Select passport nationality
- Confirm nationality
- Choose stay duration
- Select travel date
- Review visa option
- Add contact details
- Add passport & documents
- Final review and payment
Open DubaiVisa.com and Select Apply Visa
Start your Dubai visa application online from the DubaiVisa.com website. Select Apply Visa from the main navigation to open the visa application.
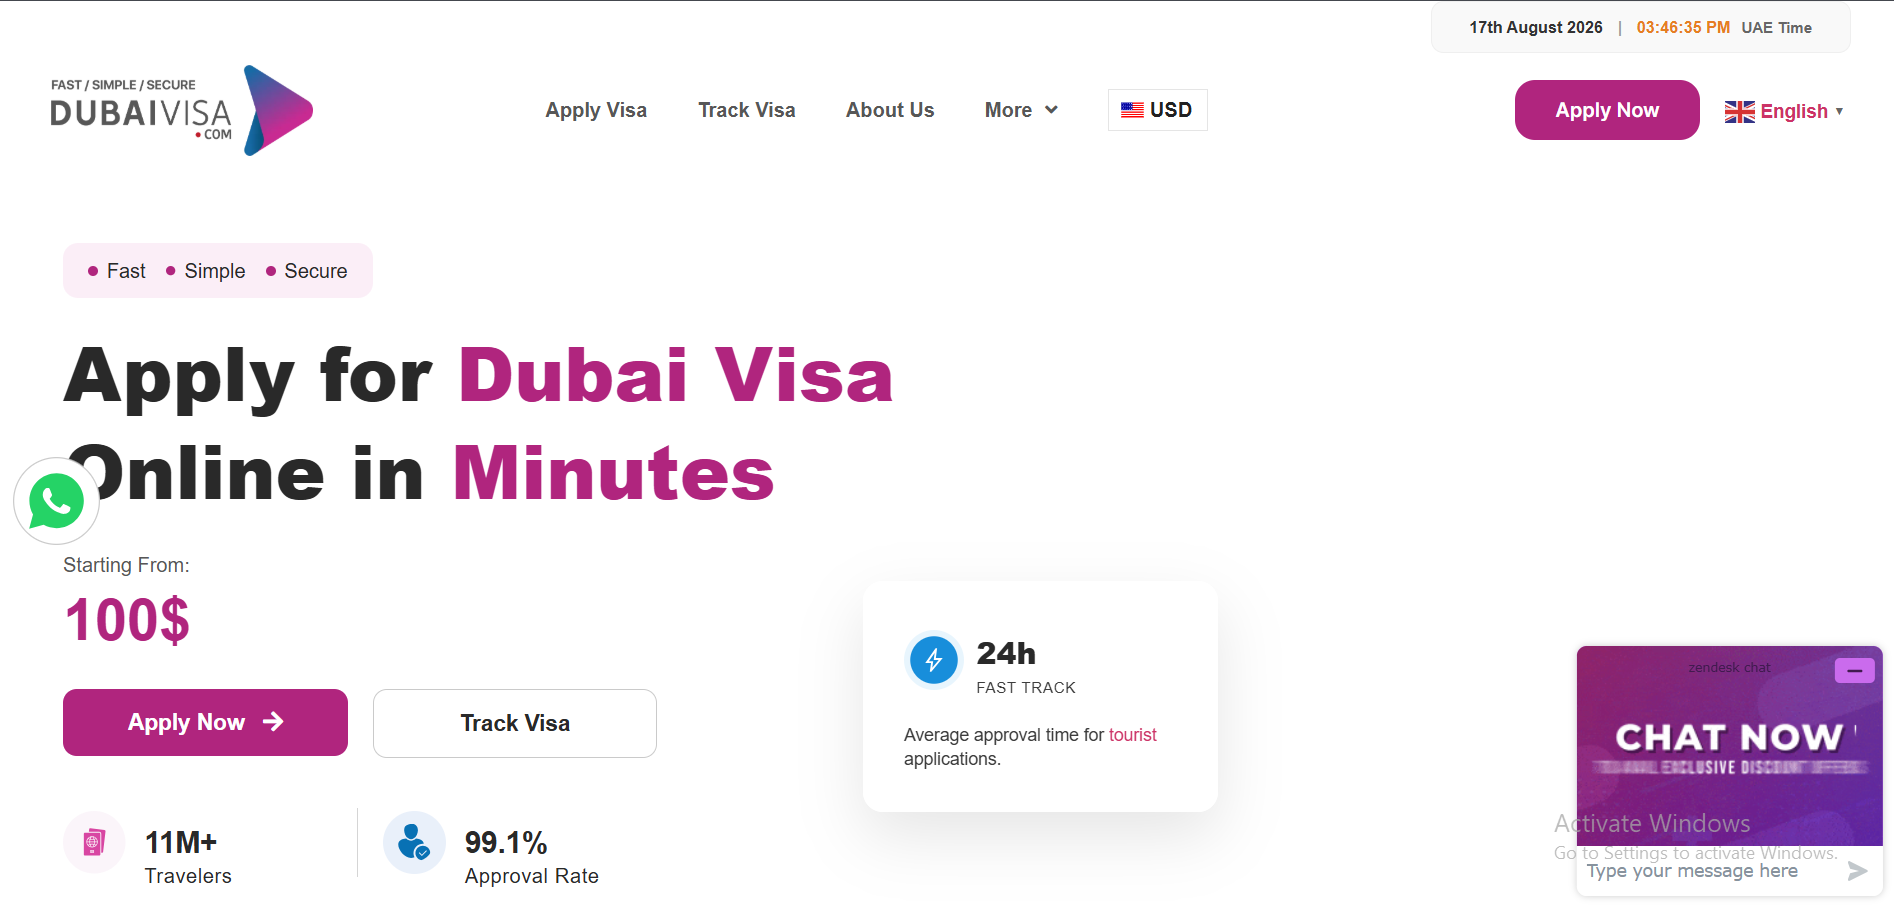
Step 1: Select Apply Visa from the DubaiVisa.com menu to begin your application.
Search for Your Passport Nationality
The first question asks for your passport nationality. Click the search field and type the country shown on the passport you plan to use for your UAE trip.
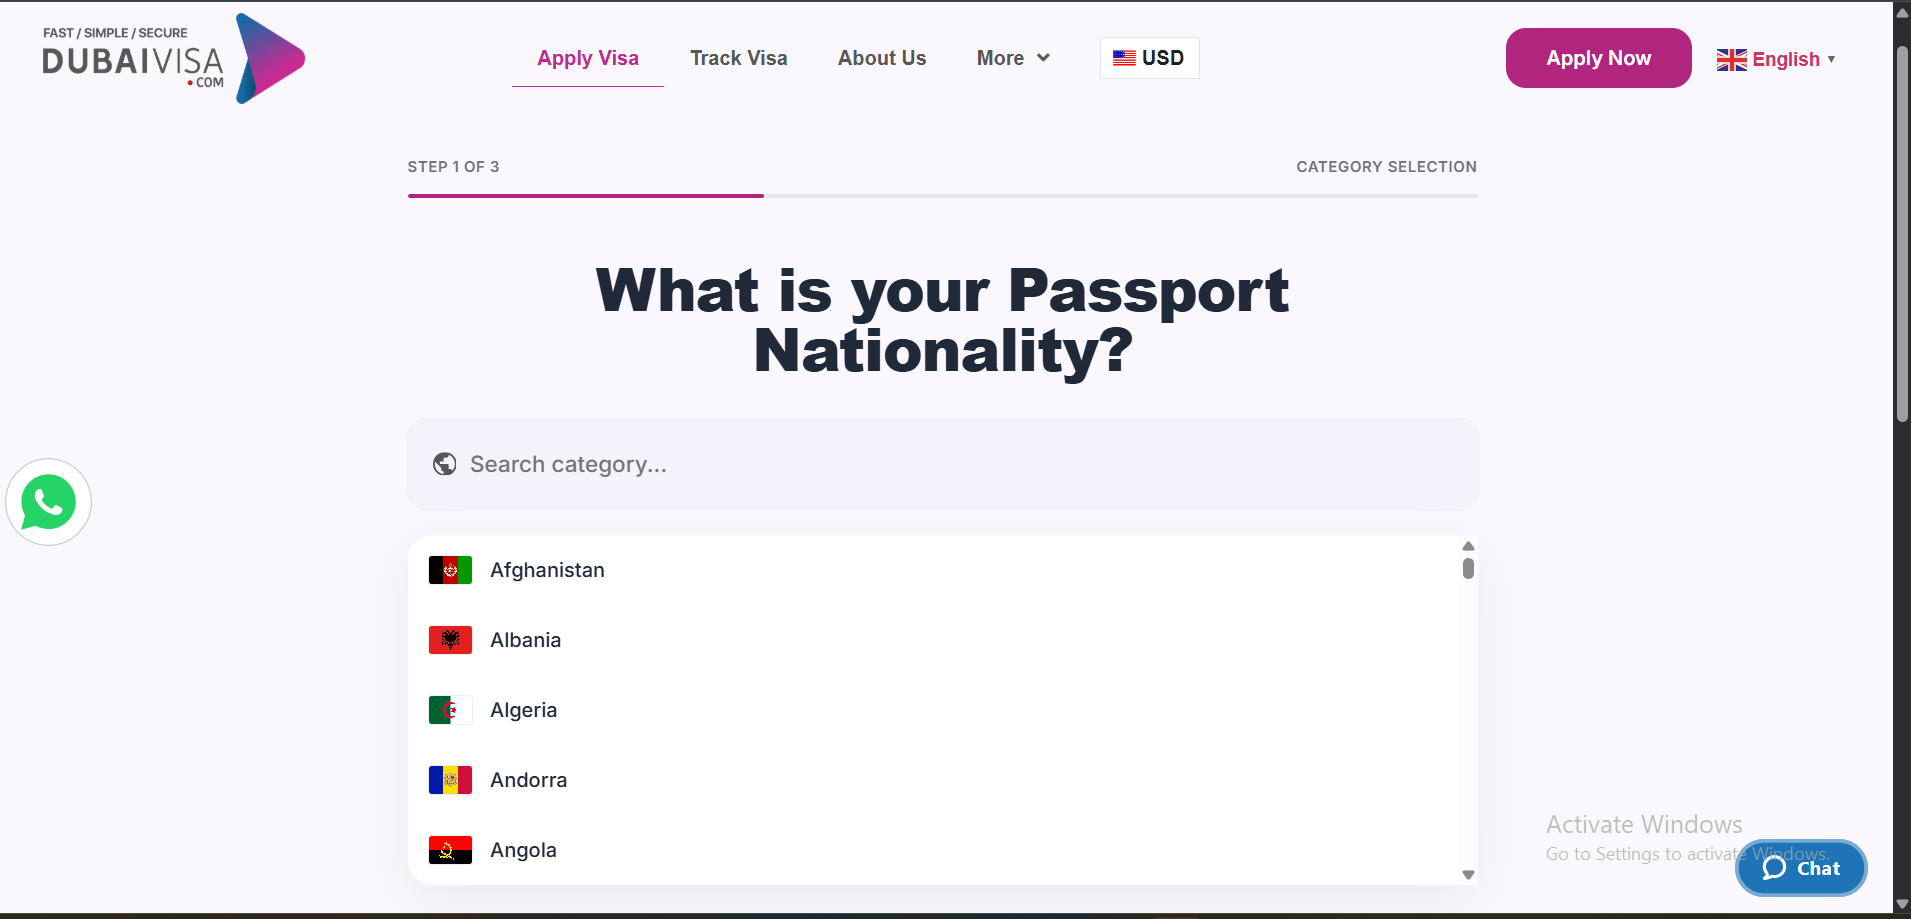
Step 2: Use the highlighted search box to find your passport nationality.
Confirm Your Passport Nationality
After selecting your country, it appears inside the nationality field. Check the selected country once more and click Continue.
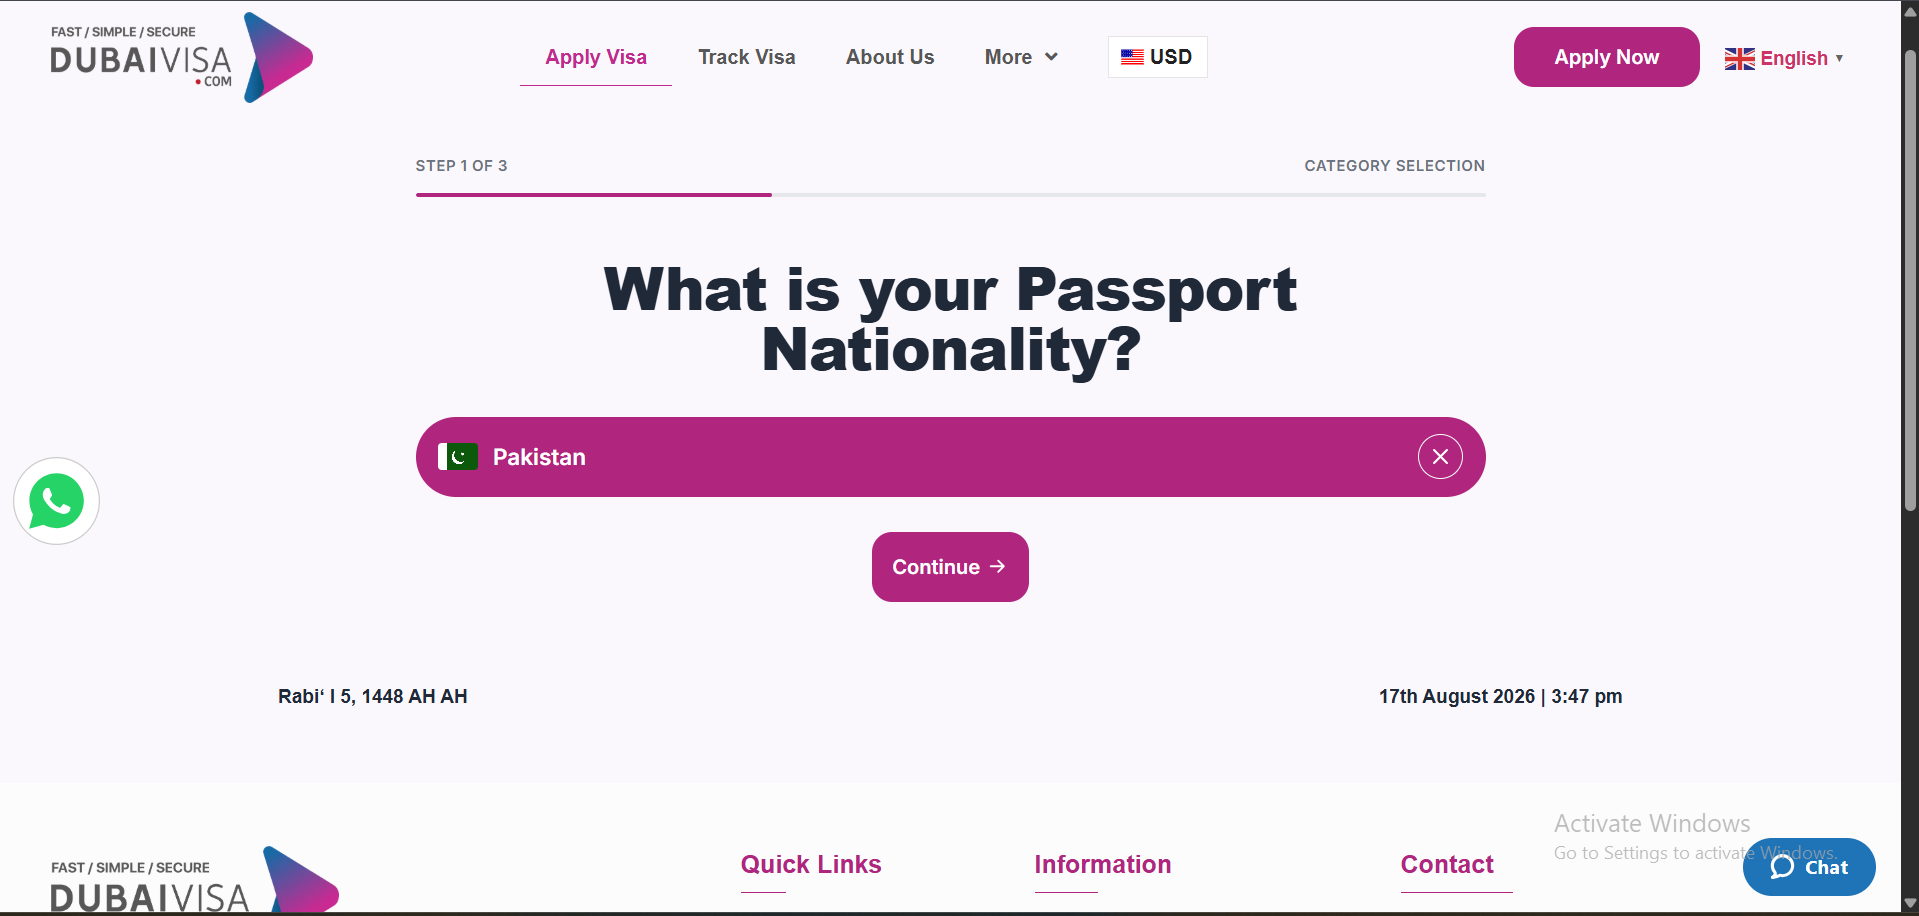
Step 3: Confirm the selected passport country and click Continue.
Choose How Long You Plan to Stay in the UAE
Select the stay range that matches your actual travel plan. The application currently displays options such as 1–14 days, 15–30 days and 31–60 days.
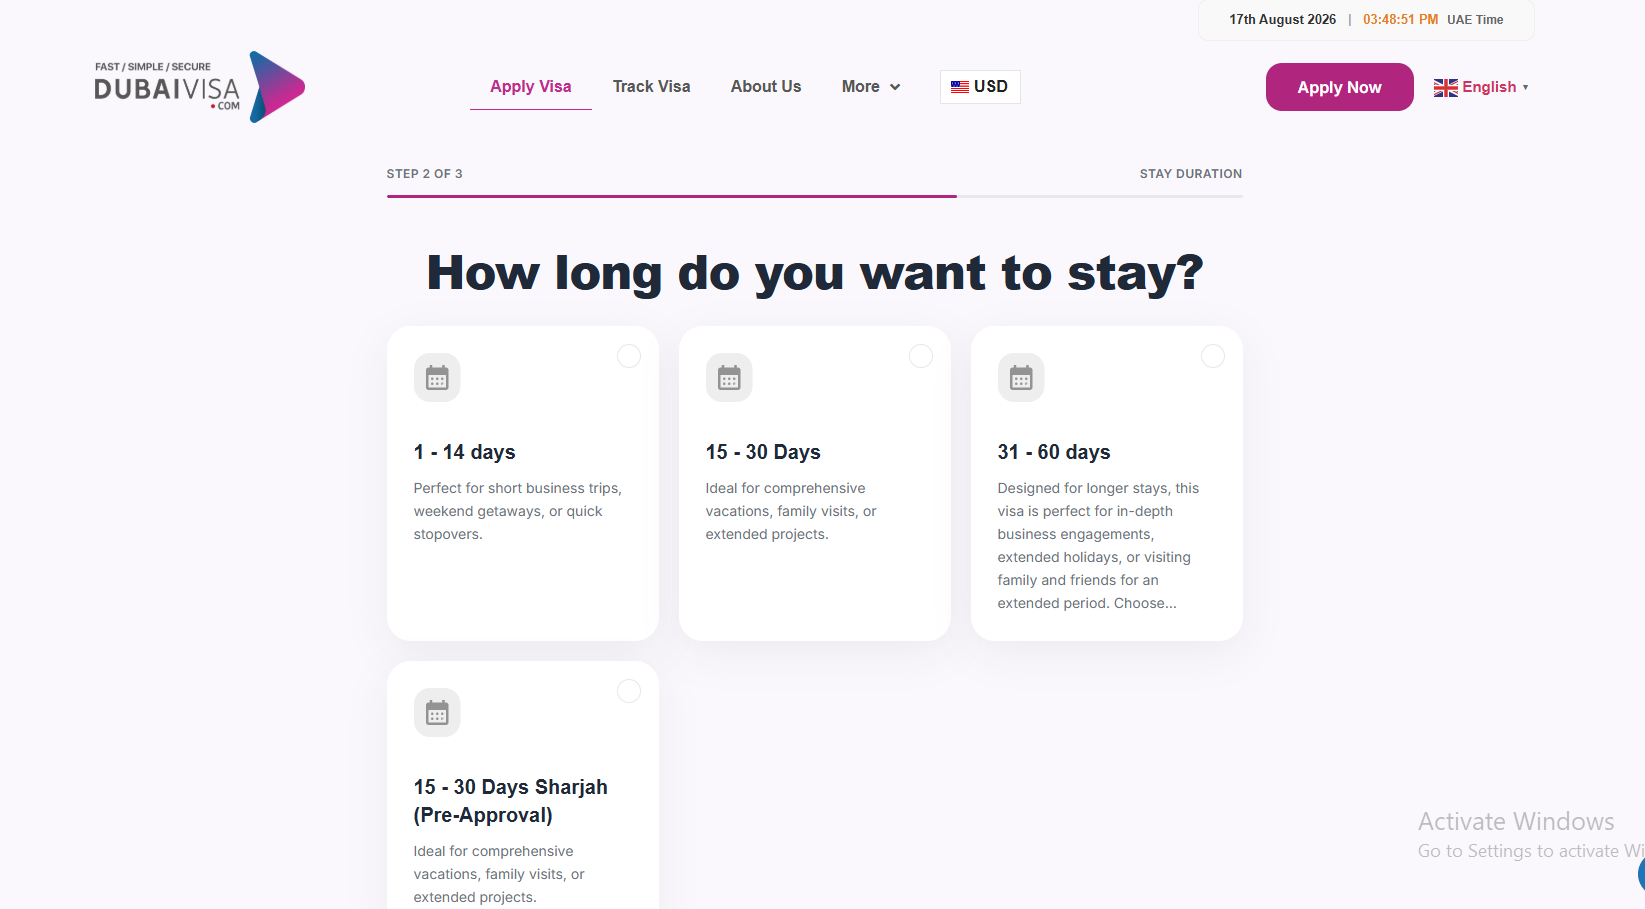
Step 4: Select the stay duration that best matches your planned UAE visit.
Do not choose a longer visa only because it gives more days. Select the stay range that fits your itinerary so the application can show a suitable option for the trip.
Select Your Planned UAE Travel Date
Use the calendar to choose your planned travel date. Once the correct date is selected, click Continue.
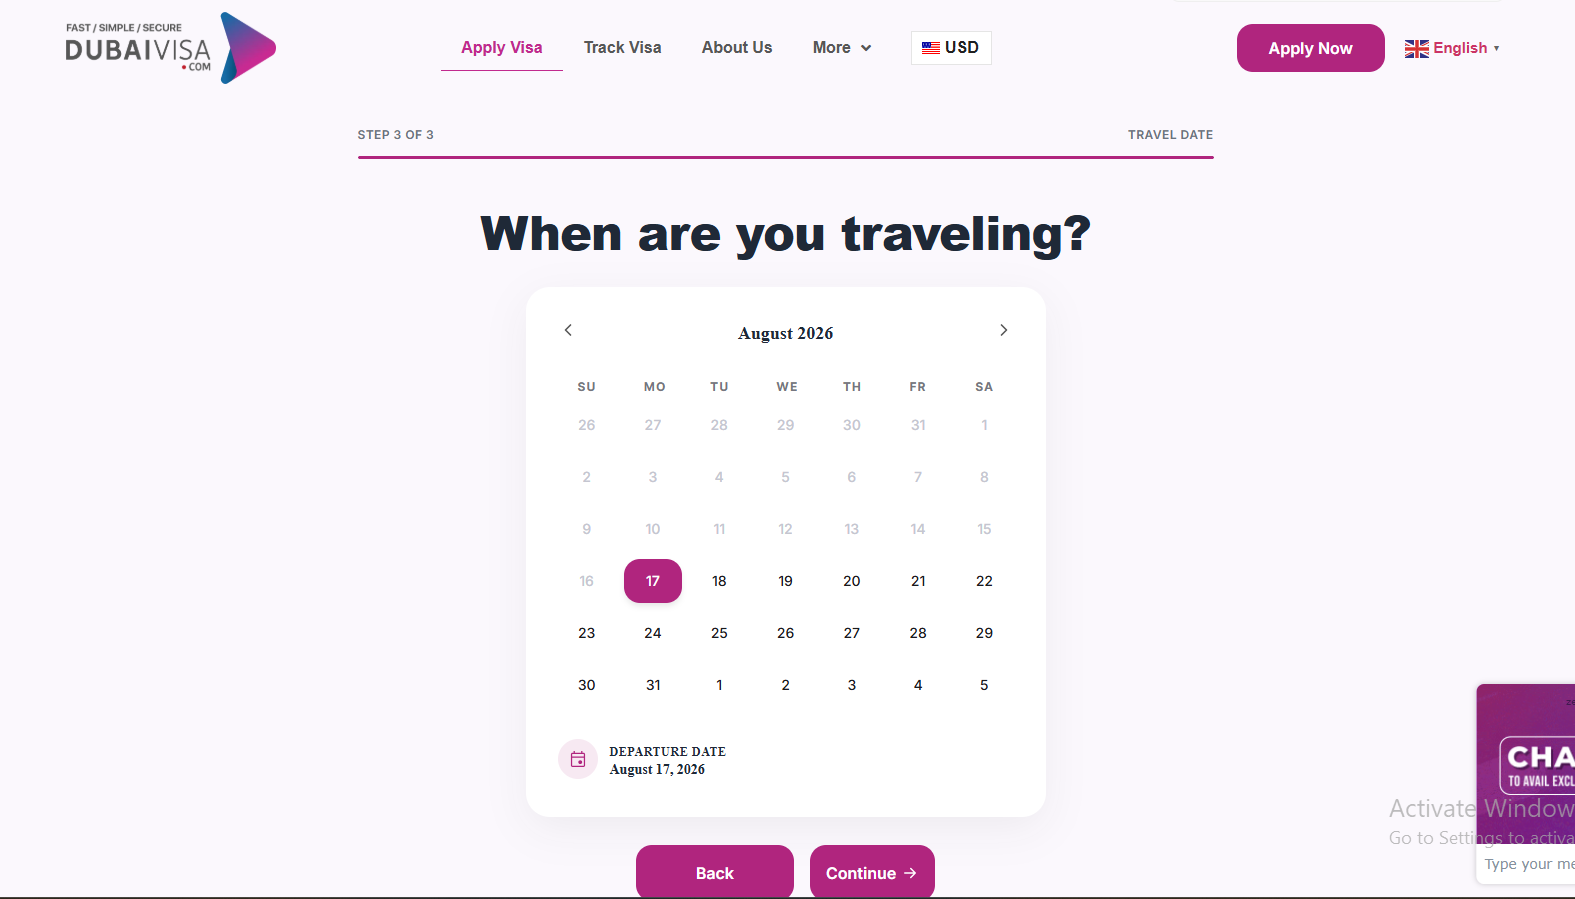
Step 5: Select your planned travel date, then click Continue.
Review the Recommended Visa and Processing Option
After the travel information is entered, DubaiVisa.com displays a visa recommendation. Review the duration, entry type, available processing choices and current payable amount.
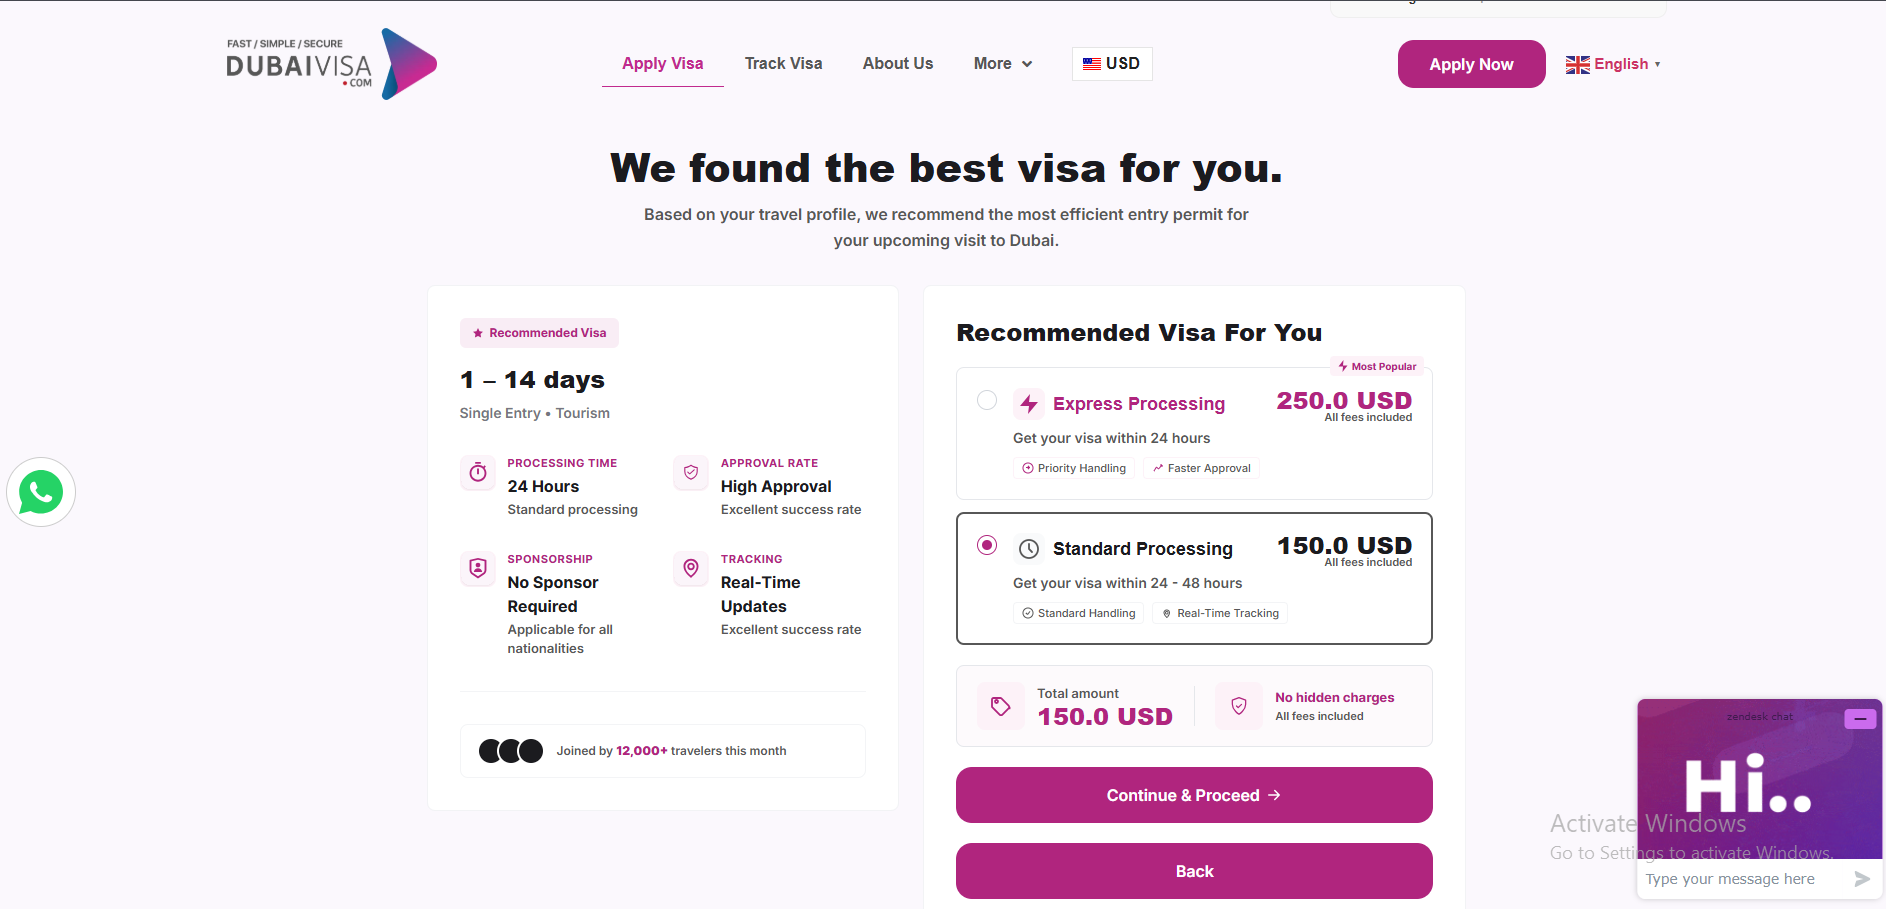
Step 6: Compare the available processing options and continue with your preferred option.
Check the Visa Before Continuing
Review the visa duration and entry type shown on the recommendation screen. Also check the processing option and the live amount shown in your application.
If both standard and faster processing options appear, select the one that fits your travel timeline and budget.
You can also compare current visa costs on the UAE Tourist Visa Price page or learn about priority processing on the Dubai Express Visa page.
Enter Your Contact Details
Complete the contact-information form using details you can access. Enter the applicant's first name, last name, email address and phone number, then continue.
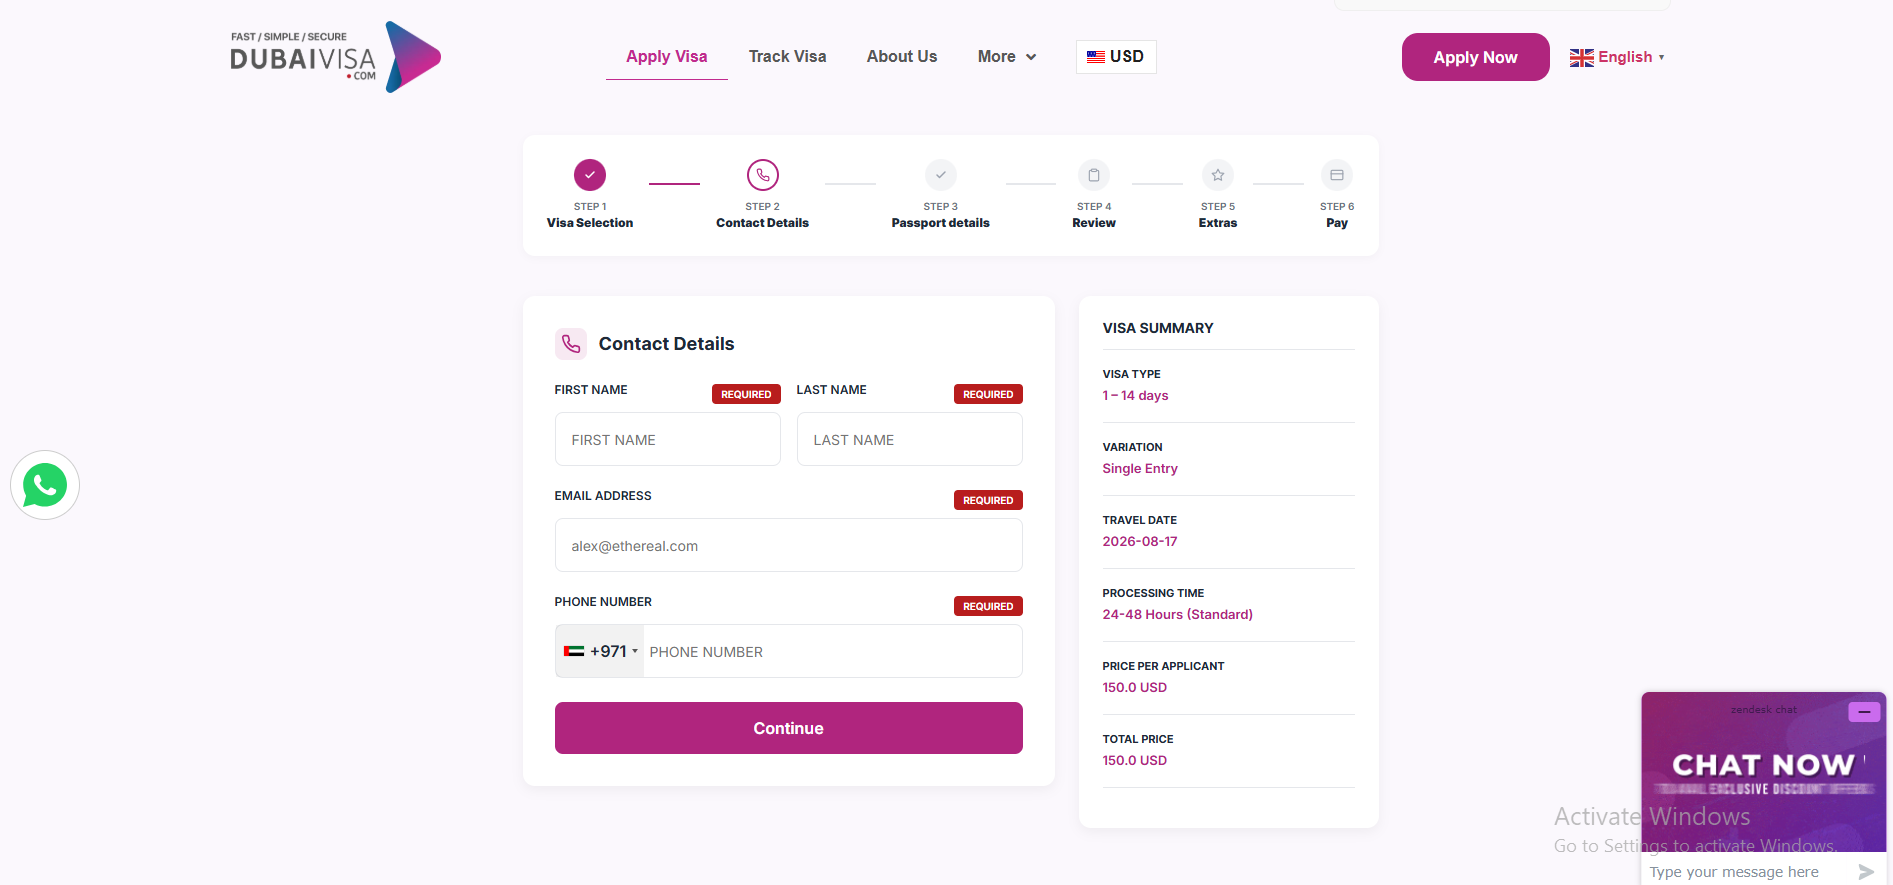
Step 7: Enter your contact information and click Continue.
Use an Active Email and Phone Number
Enter your name carefully and use contact information you can access during the application process.
Complete Passport Information and Upload Documents
Enter the applicant's passport information exactly as it appears on the travel document. Then upload the passport images and any other documents requested by the application.
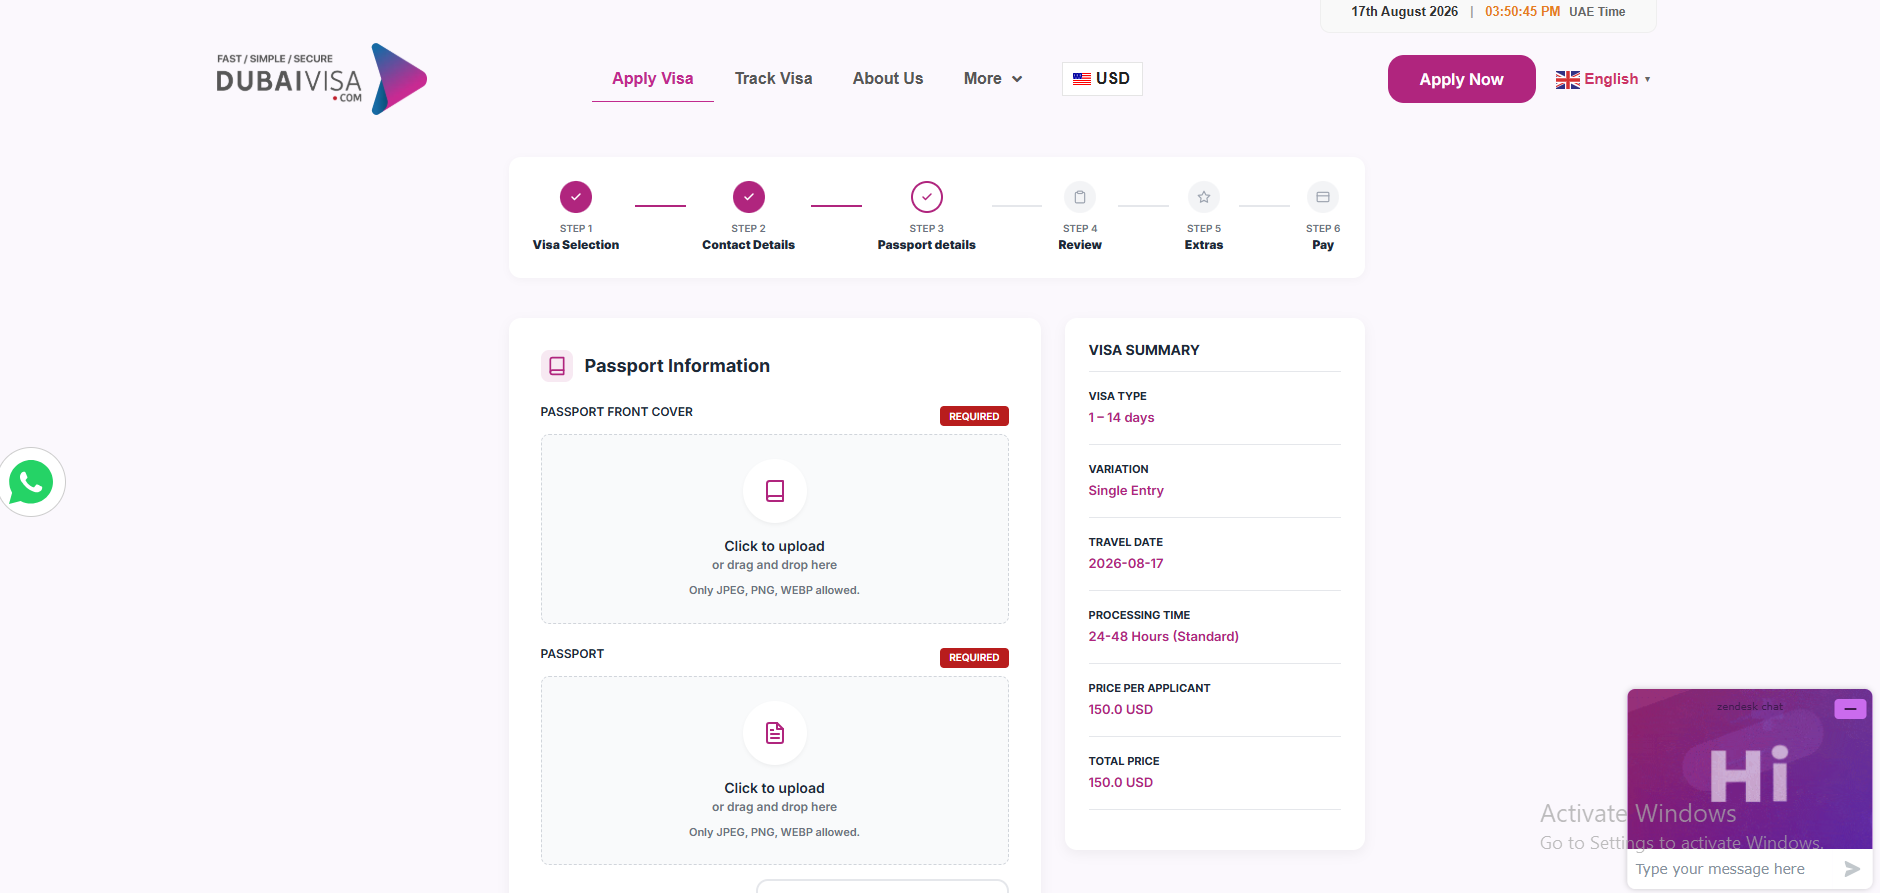
Step 8: Upload a clear passport front cover and passport bio page in the highlighted fields.
Upload Clear Passport Images
The application provides separate upload fields for passport documents. Use clear files where the applicant information can be read easily.
For a detailed document checklist, see our Dubai Visa Requirements page.
Final: Review Your Application and Complete Payment
After the passport section, continue through the remaining Review, Extras and Pay stages shown in the application progress bar.
Review All Applicant Details
Check your application carefully before payment. Compare the information with the passport rather than relying only on memory.
- Check the applicant's full name.
- Confirm passport number.
- Check passport nationality.
- Check date of birth and passport expiry date.
- Confirm the selected visa duration.
- Confirm entry type where applicable.
- Check the planned travel date.
- Review the selected processing option.
- Check the final amount before payment.
Review Optional Extras
If the application shows optional travel services, review them individually. Add only the extras you want before moving to the payment stage.
Complete the Payment
When all applicant and visa information is correct, proceed to checkout and complete payment using the available payment option. Keep the confirmation and tracking details provided after submission.
What Happens After You Submit the Dubai Visa Application?
Keep your application information available after submission. If the application requires another document or clearer file, provide the requested information carefully.
Common Mistakes When Applying for a Dubai Visa Online
Useful Dubai Visa Guides Before You Apply
Check requirements, prices, processing times and visa durations before submitting your UAE visa application.
Dubai Visa Online Application FAQs
How do I apply for a Dubai visa online?
Start the DubaiVisa.com application, select your passport nationality, stay duration and travel date, review the visa option, enter your contact and passport details, upload the requested documents, review the application and complete payment.
Which nationality should I select in the application?
Select the nationality shown on the passport you plan to use for your UAE trip.
How do I choose my Dubai visa duration?
Select the stay range that matches the length of your planned UAE trip. The application uses the travel information before displaying an available visa recommendation.
What information do I enter after choosing my visa?
The application asks for contact information followed by passport details and supporting documents.
What passport documents do I upload?
The application can request the passport front cover and passport bio page. Other supporting documents may also be requested depending on the application.
Can I choose a faster processing option?
If more than one processing option is available, compare the choices displayed on the visa recommendation screen before proceeding.
Can I correct information before payment?
Review the applicant and visa information before checkout and correct any mistake before completing payment.
How do I track my Dubai visa application?
Applications submitted through DubaiVisa.com can be checked through the online visa tracking page using the relevant application details.
Ready to Start Your Dubai Visa Application?
Keep your passport and travel information ready, follow the application steps above and check every detail before submitting your application.
Apply for Dubai Visa Online